VSCode
VSCode Launch Script
When you use the ./vscode.sh launch script, it will help you install all of necessary VSCode extensions, as well as open the project in VSCode.
If the code CLI is already installed, you can run
This will install any needed extensions and launch vscode. Wait until the process is done...
⭐️ Note: The first time you run the script, you will need to close the VSCode window that opens, and then run the script again. This is because the script will install the necessary extensions, and then you need to reopen VSCode to apply them.
Building the dev environment
When you open VSCode the second time, a pop up (see below) will appear asking you if you want to re-open the project in a dev container. Simply click on this option, and it will automatically build the development containers for you.
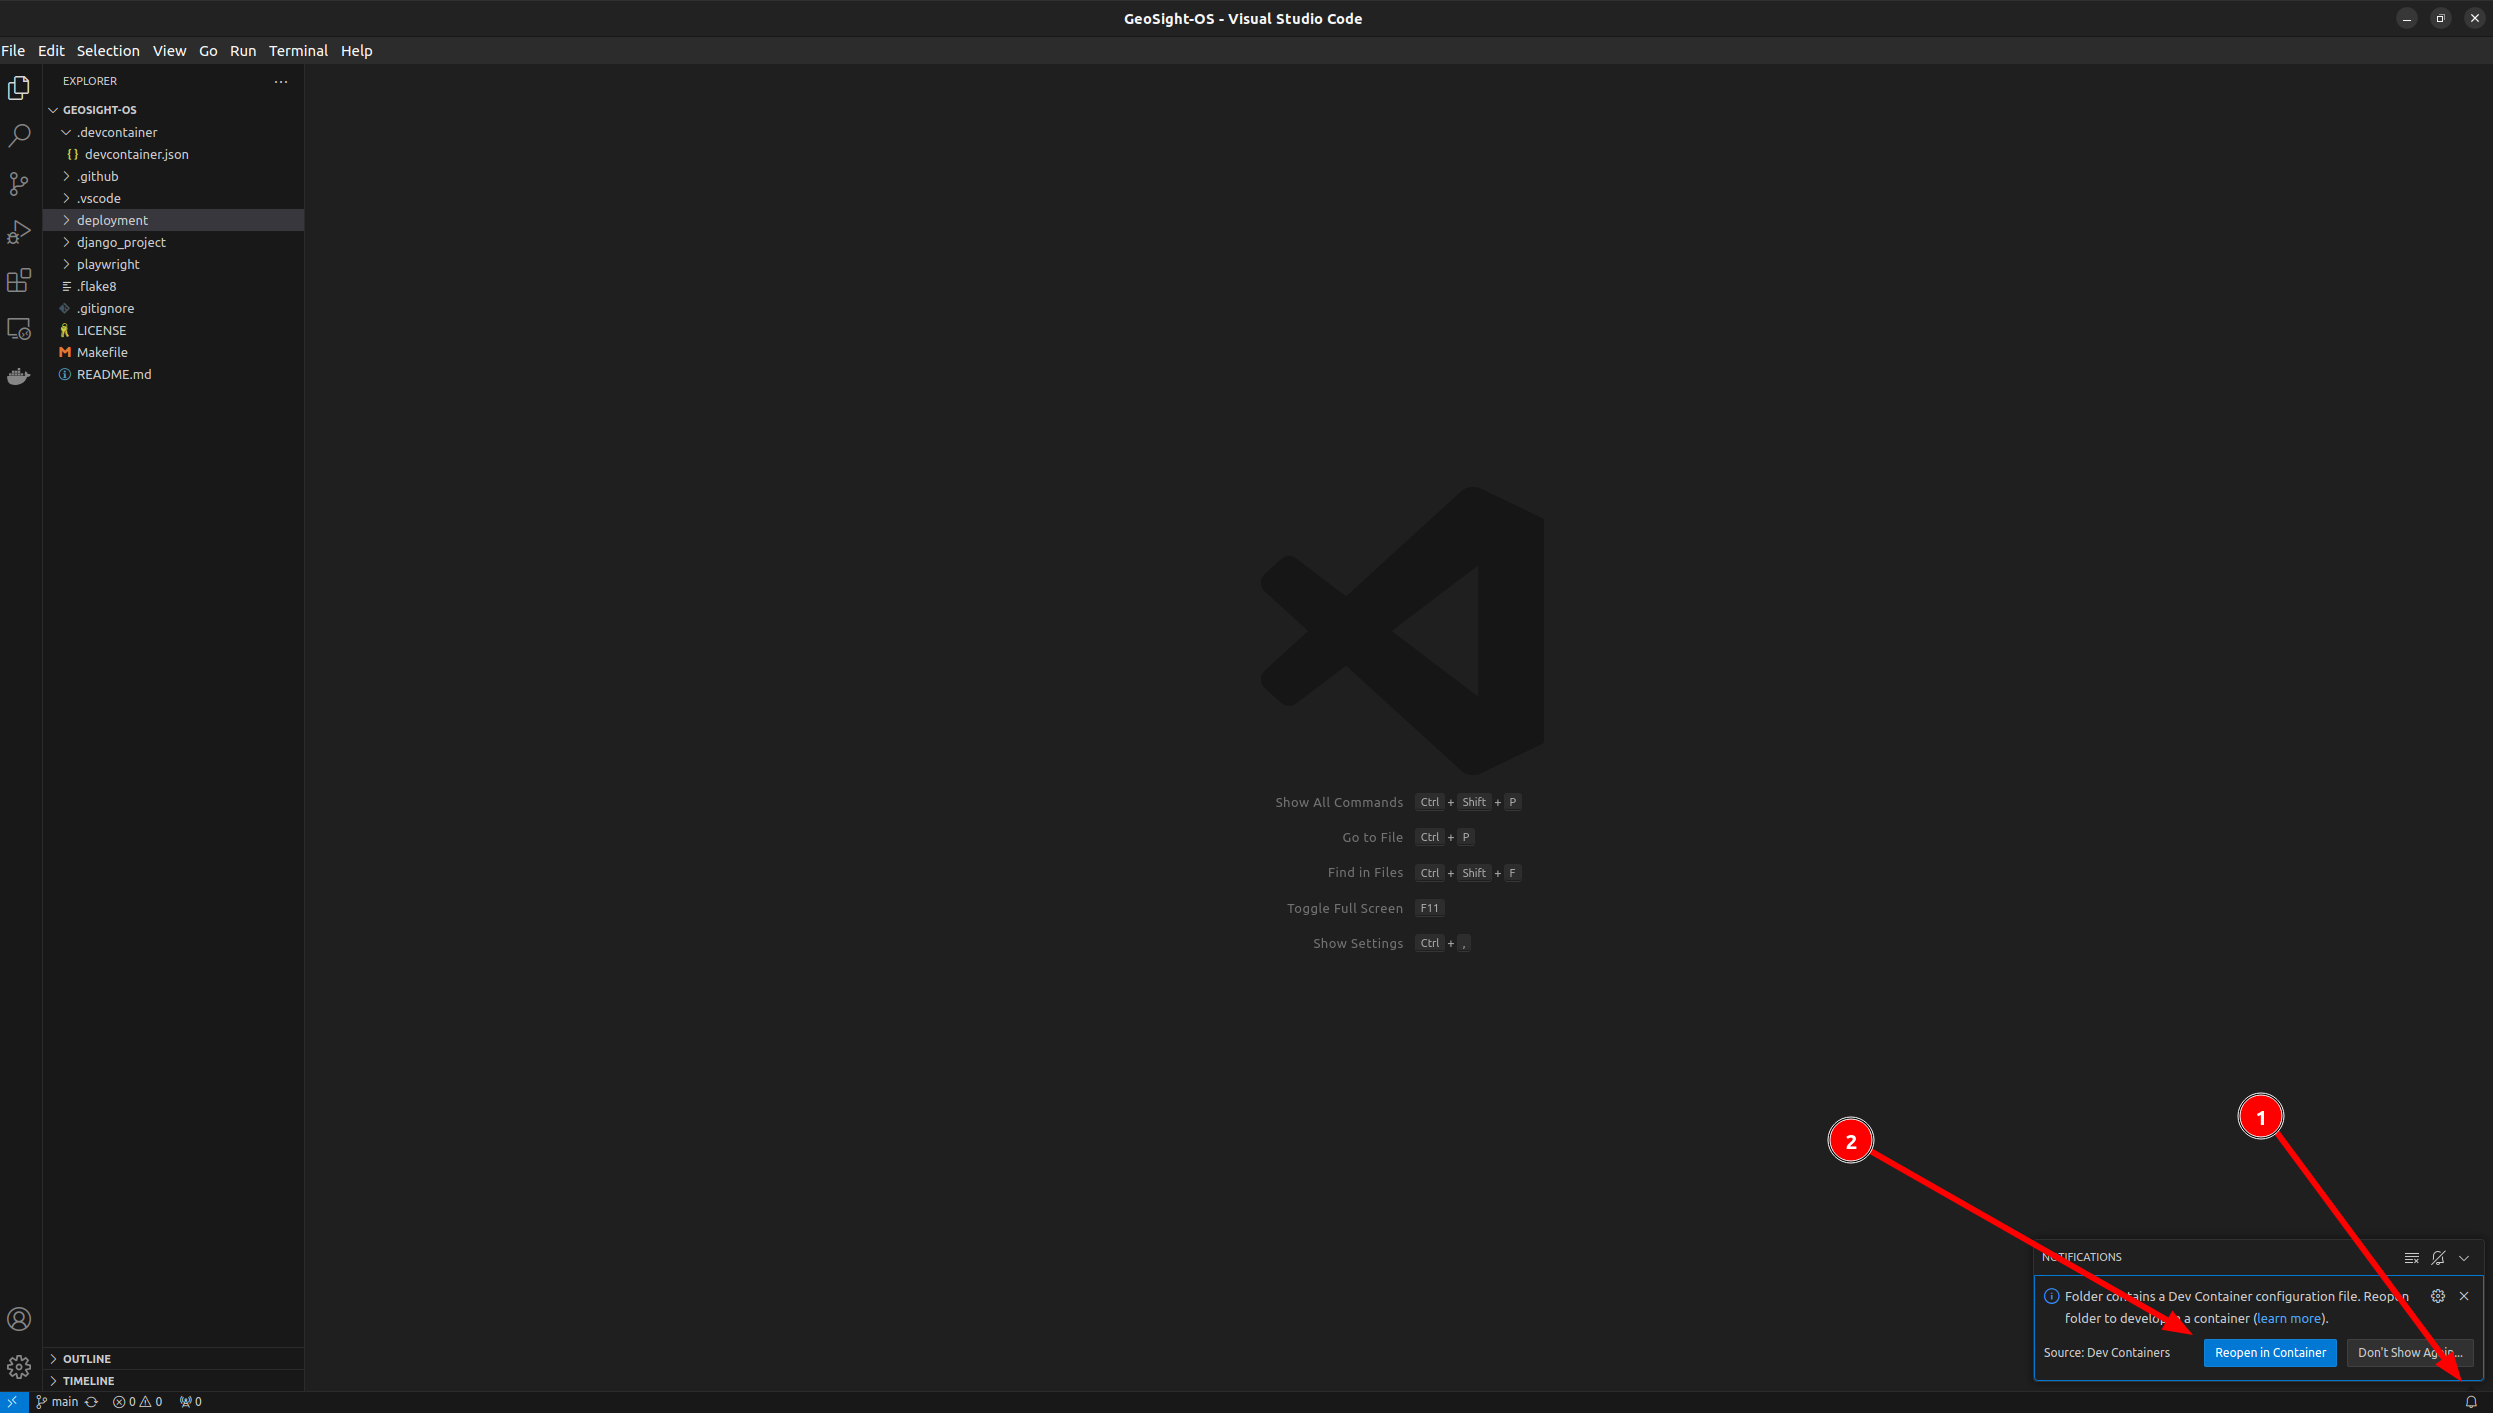
🚧 If no "Reopen in container" popup appears automatically, you can initiate the process manually by checking No Reopen in container shows guide.
So what happens when you run the project in a dev container? The script will do the following:
- Rebuild the dev container and mount your code tree inside the (docker) container.
- Install all the necessary Python dependencies inside the container.
- Set up port forwarding so that you can access the application running inside the container from your host machine.
- Start the Django development server inside the container.
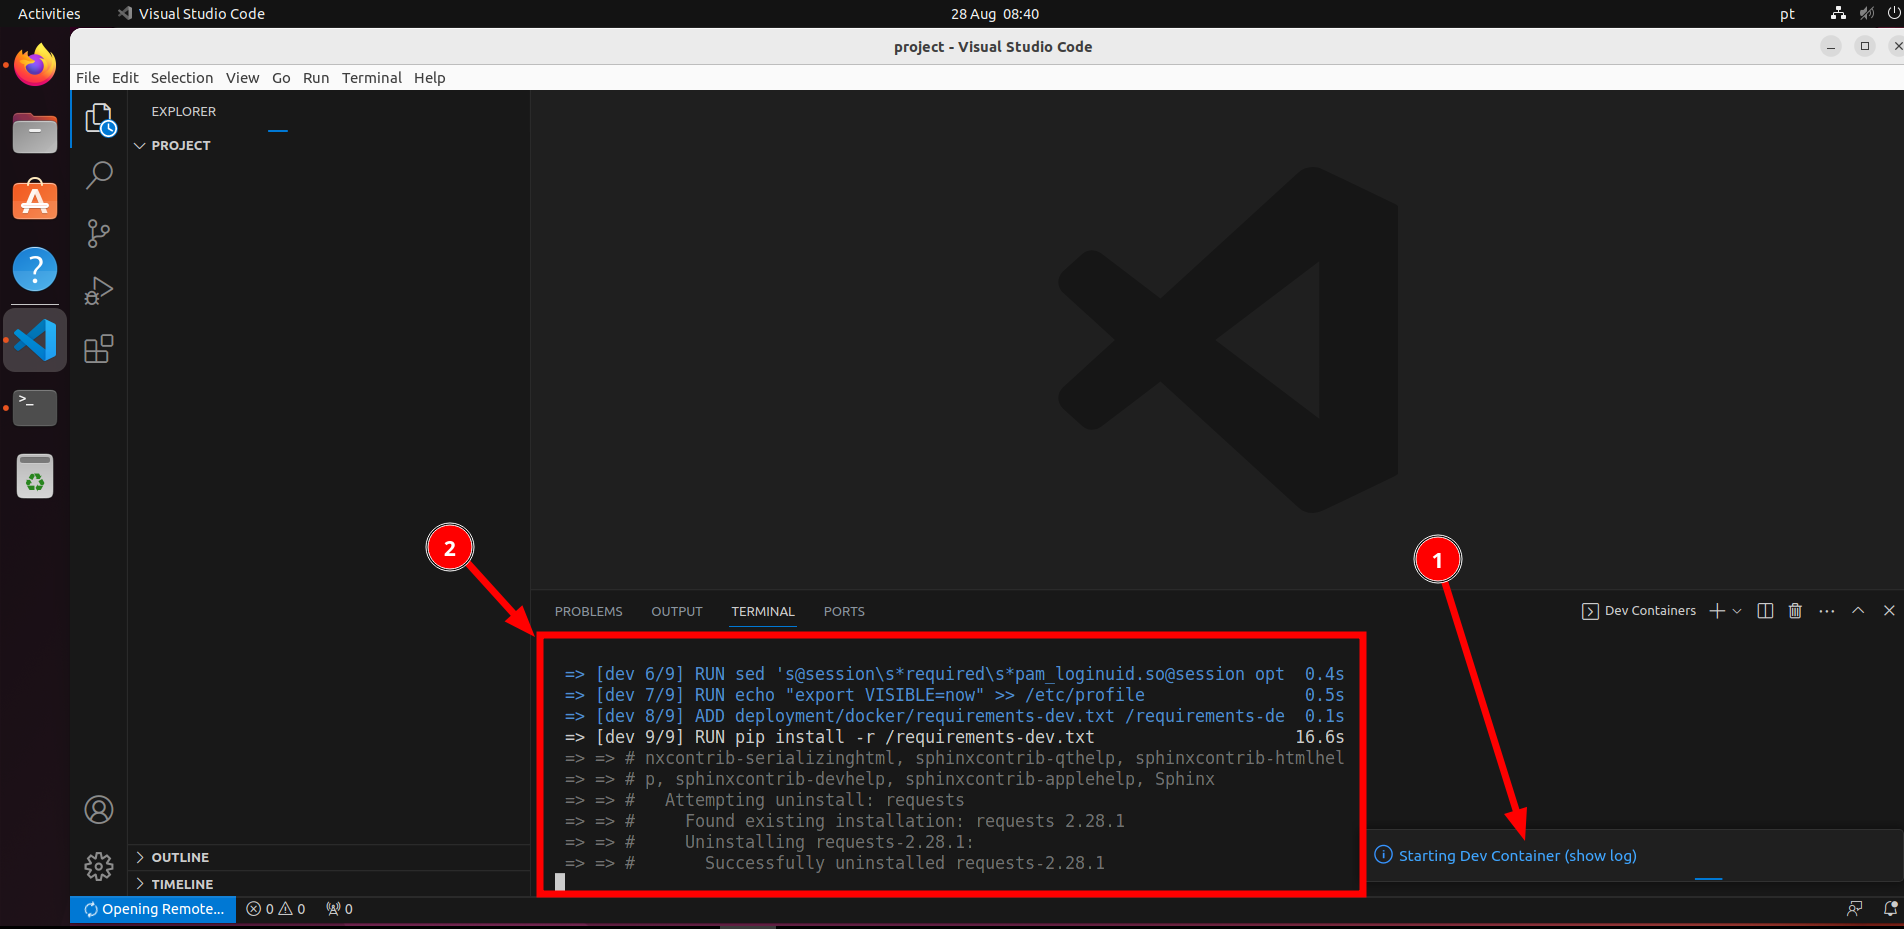
Once you click on the "Reopen in container" option, VSCode will start building the dev container. You can see the progress in the terminal window that opens up.
Once the task is running, a notification 1️⃣ will be shown in the bottom right of the VSCode window. Clicking in the notification will show you the setup progress 2️⃣. Note that this make take quite a while depending on the internet bandwidth you have and the CPU power of your machine.
At the end of this process, you will see a message like this:
Once you see that, you can continue the next step below.
🚩 Note: The Port forwarding can change everytime you deploy. As long as it says
terminated with code 0 and signal null, you are done and can continue to next step.
Run application
After completing the steps above, You need to run the app.
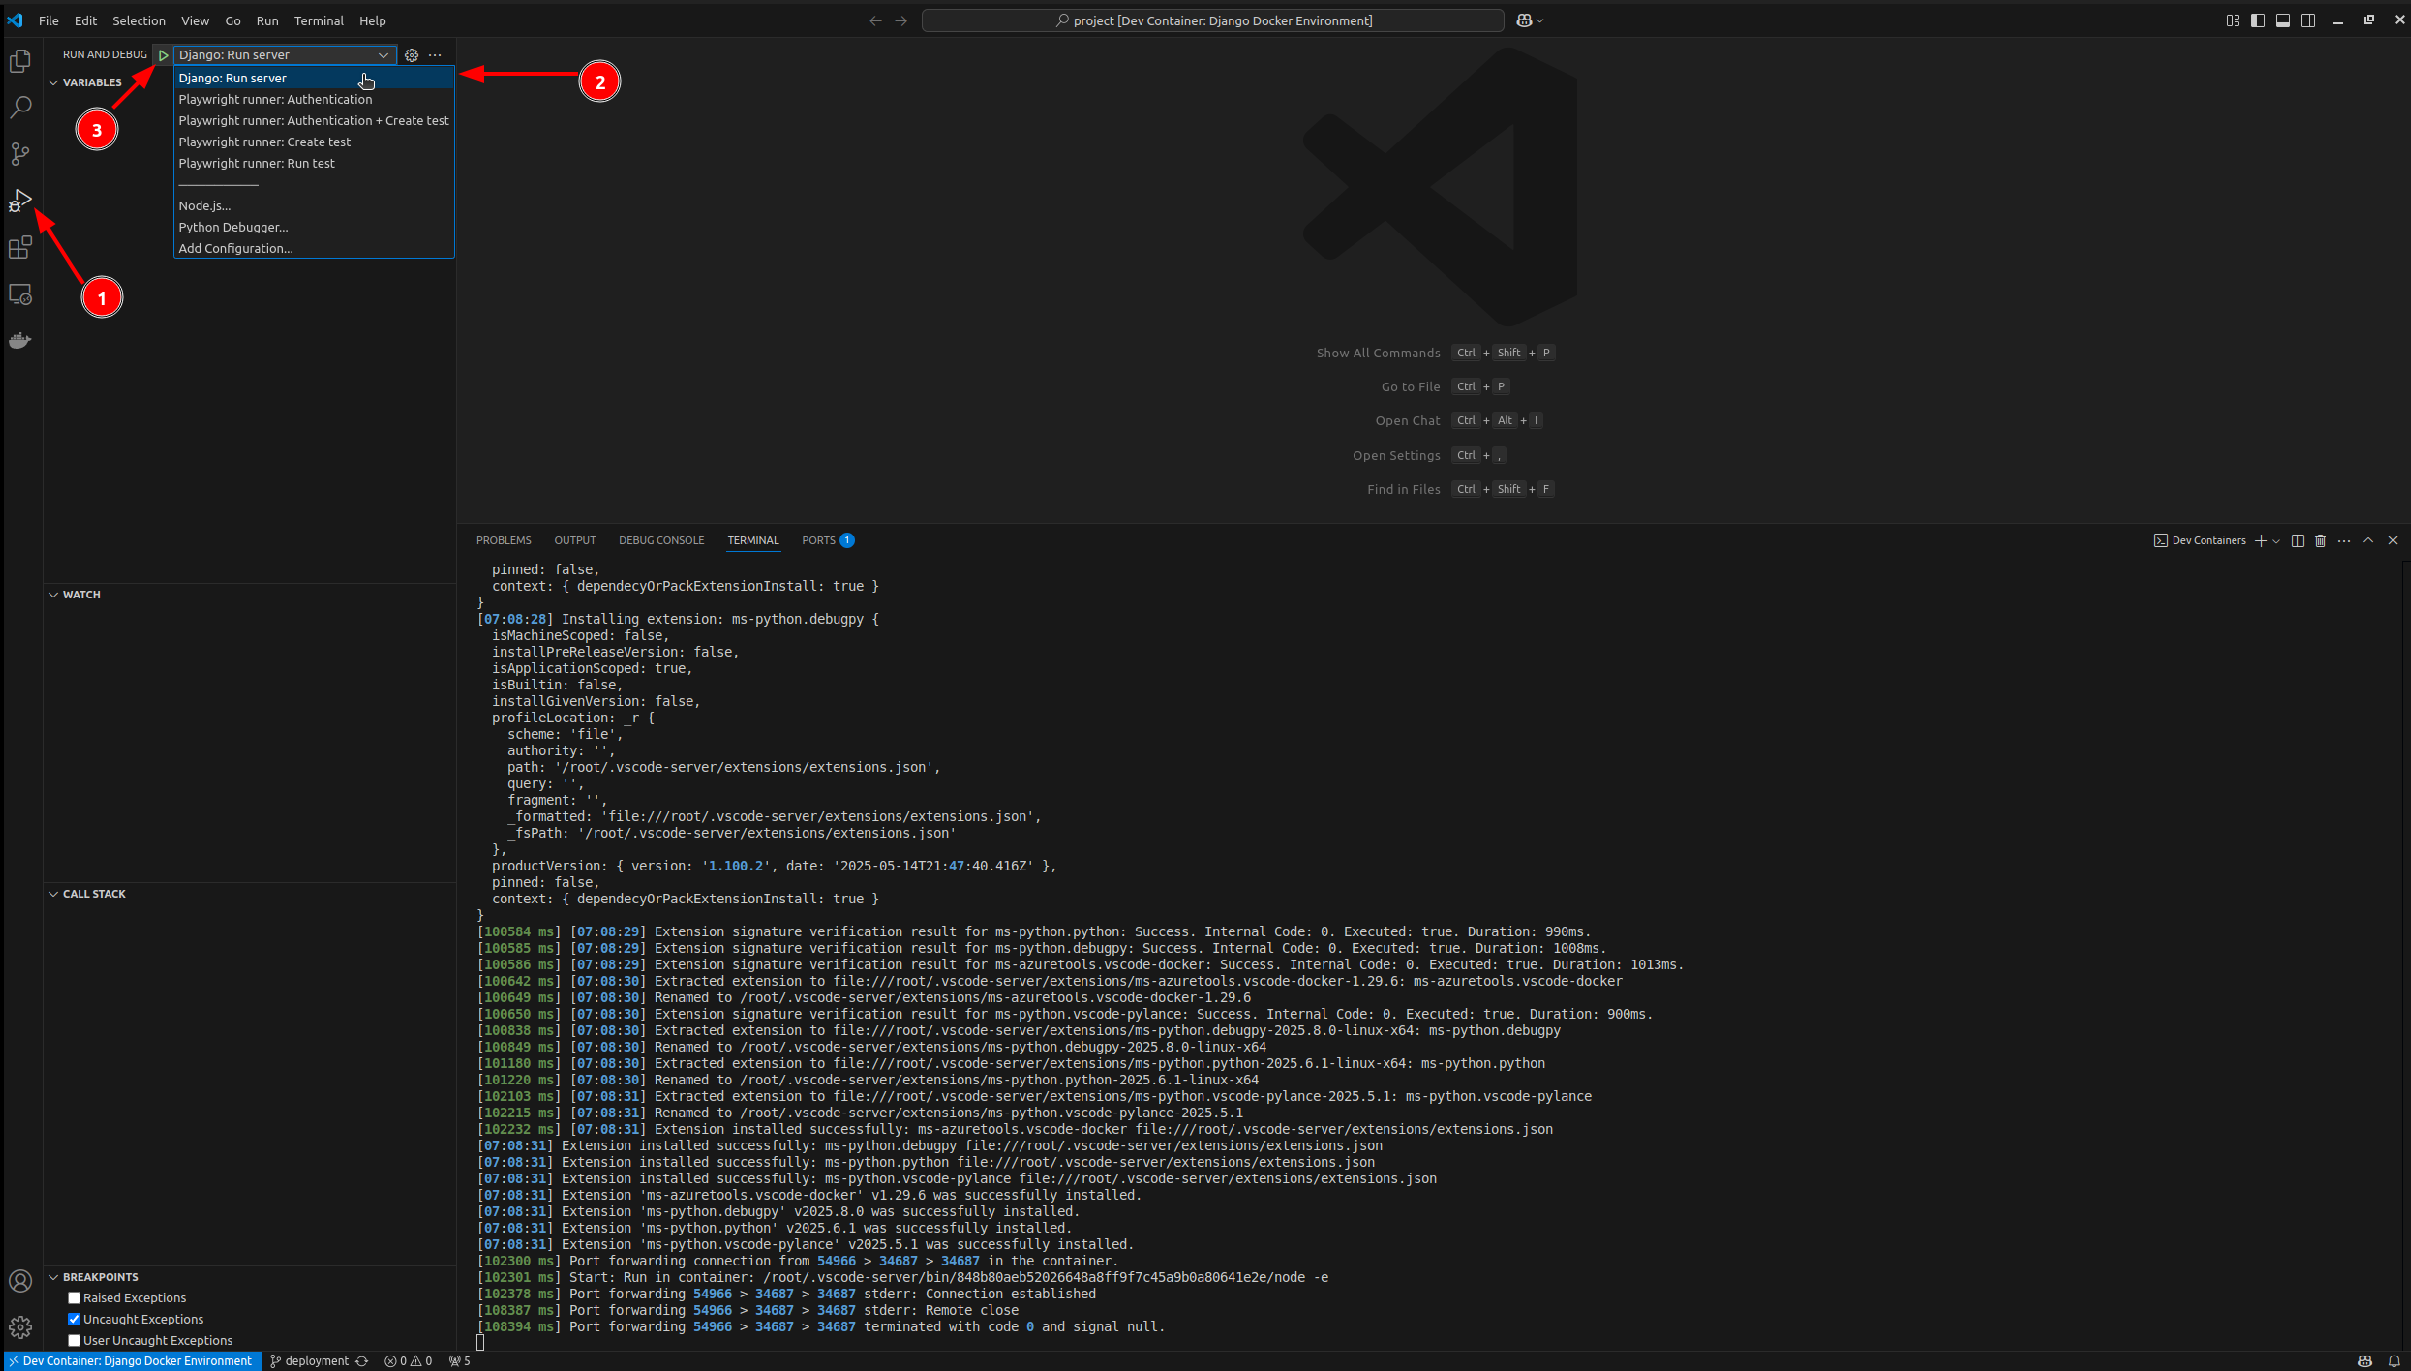
Click the Run and Debug button 1️⃣ and then select Django: Run server 2️⃣. After it is selected, click Start Debugging 3️⃣.
After running, it will a new tab in the bottom right of the VSCode window.
You need to wait for the Python debug to finish starting by saying Quit the server with CONTROL-C.3️⃣,

Viewing your test instance
After completing the steps above, you should have the development server available.


To open the application, you should follow the operating system specific instructions below:
-
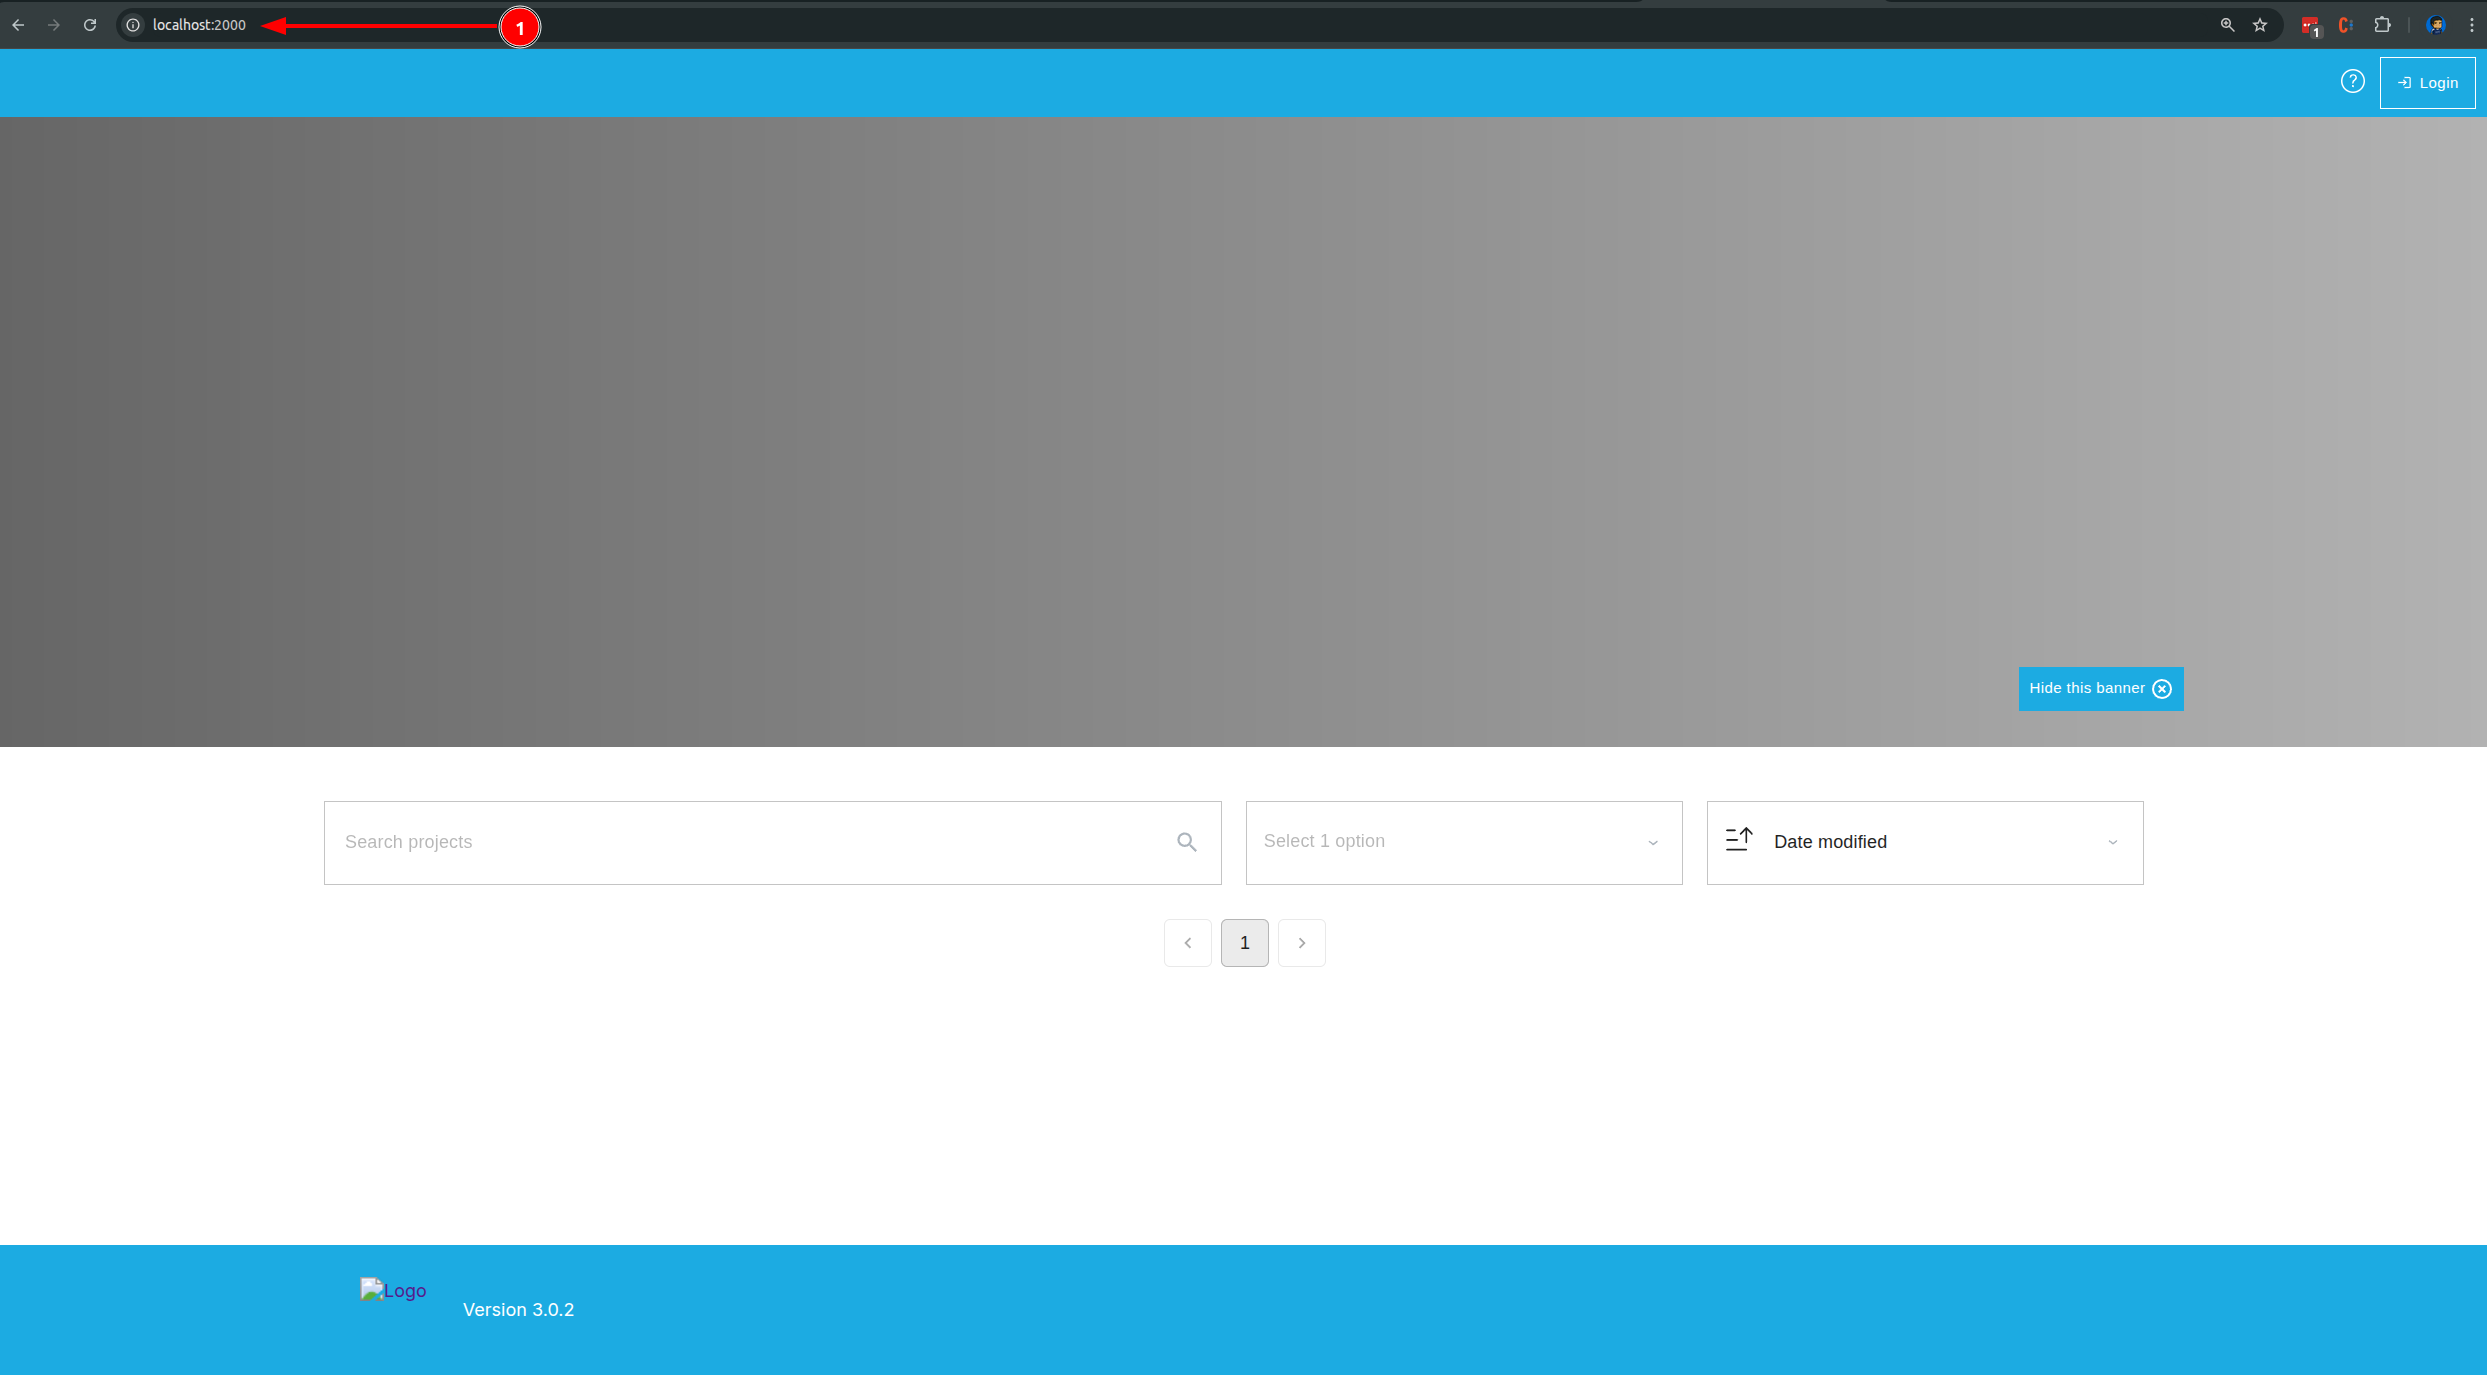
🍏 macOS: On macOS, this will show a blank page because VSCode copies using 0.0.0.0:2000, which does not work on macOS. You can manually access it at http://localhost:2000.
-
🐧 Linux: On Linux, you can access the application at http://localhost:2000.
-
🪟 Windows: On Windows, you can access the application at http://host.docker.internal:2000. Alternatively you can access it on http://[your ip address]:2000.
The site will be rather bare bones since it will need to be configured in the admin area to set up the theme etc.
By Default, we can use the admin credential:
🪧 Now that the application is set up, you may begin making updates or choose to work with the provided demo data. For instructions, please refer to the Demo Data Guide.
Troubleshooting
No code CLI found
If the VSCode cli check fails, you can try to install VSCode manually.
Linux
Try following the installation instructions for your distribution on the VSCode download page.
Windows
- Open Windows VS Code
- Install the "Remote - WSL" extension
- Open a WSL terminal and try check again
MacOS
- Open VS Code
- Press Cmd+Shift+P
- Type: Shell Command: Install 'code' command in PATH
- Press Enter
- This will create a symlink:
And try to check it again via
If you succeed with setup code cli, you can move to configuration.
If you are still having trouble you can try to set up things manually.
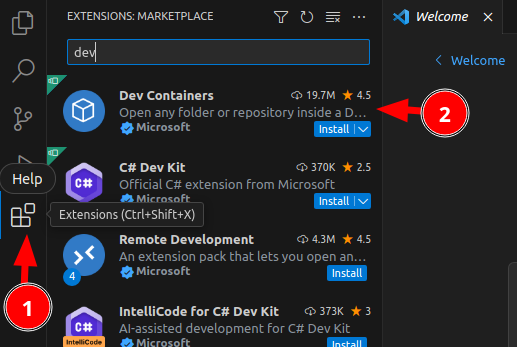
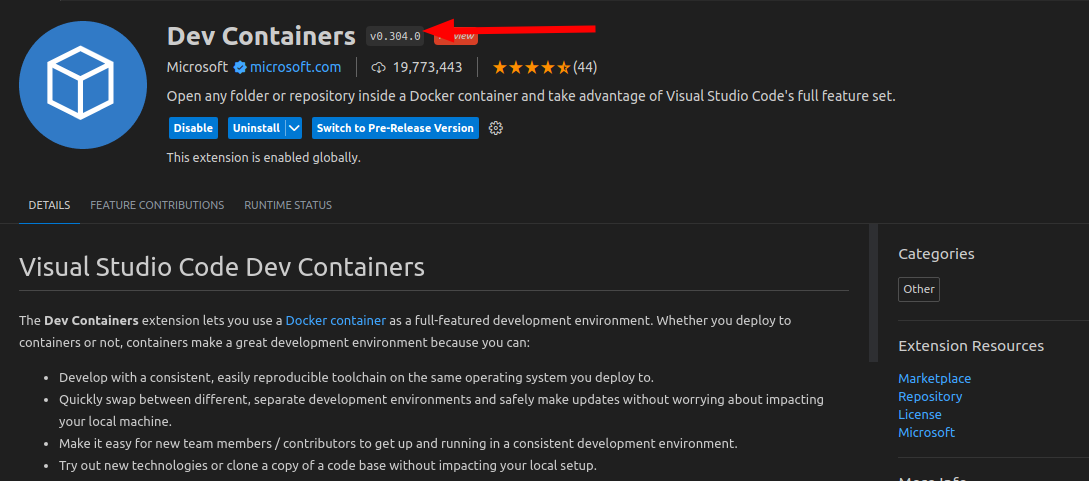
Installing devcontainers extension
You can install Dev Containers extension manually (minimum version 0.304.0).
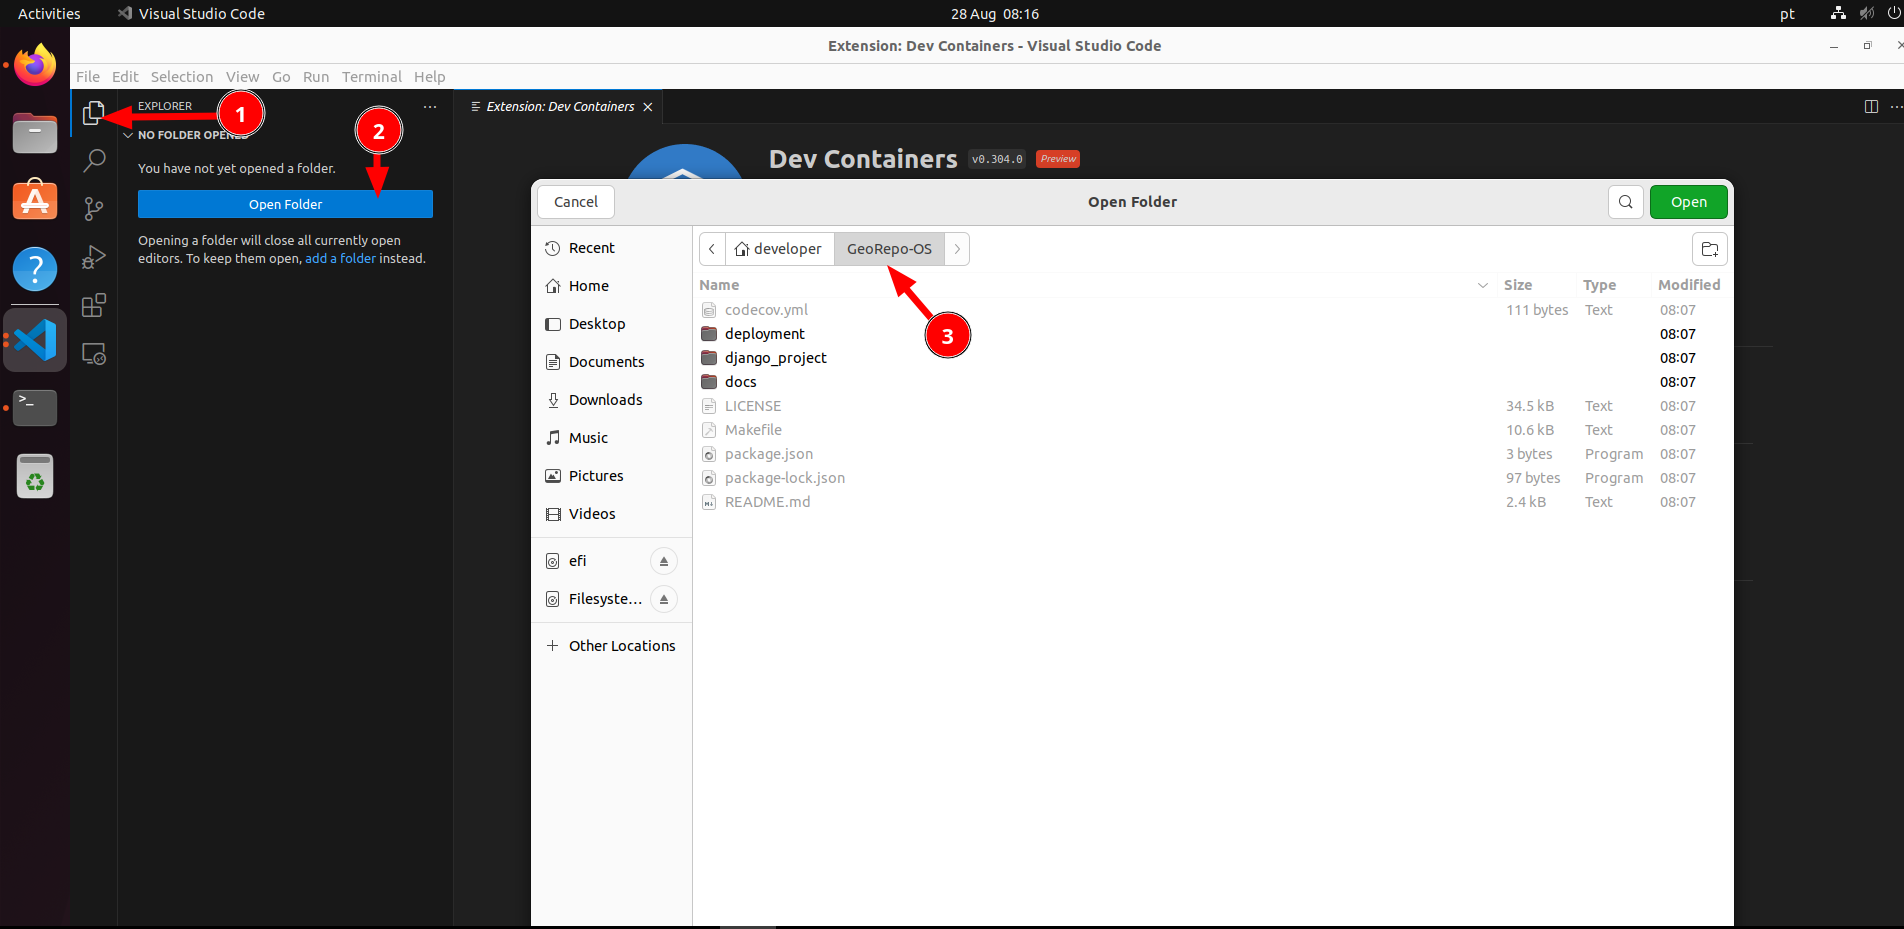
Open project
Open the project in VSCode (1️⃣, 2️⃣) by navigating the place on your file system where you checked out the code in the pre-requisites step above (3️⃣).
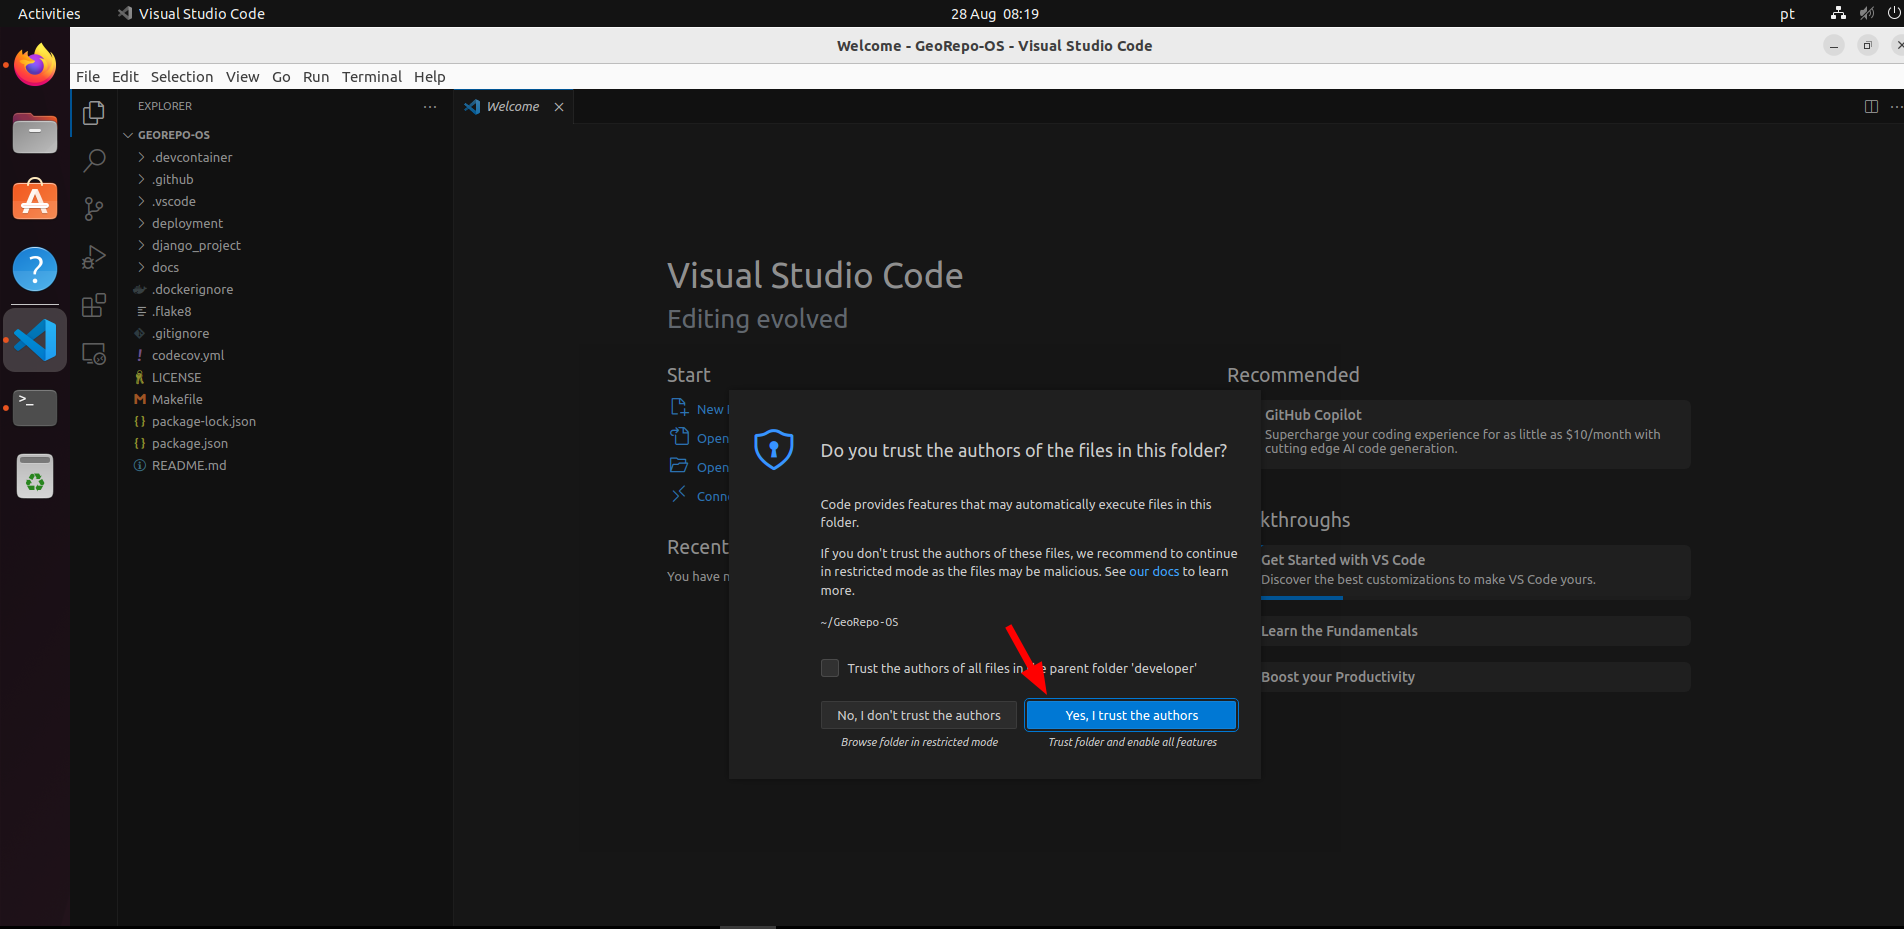
Accept the 'trust authors' prompt
After that everything above is done, you can move on to Building the dev environment.
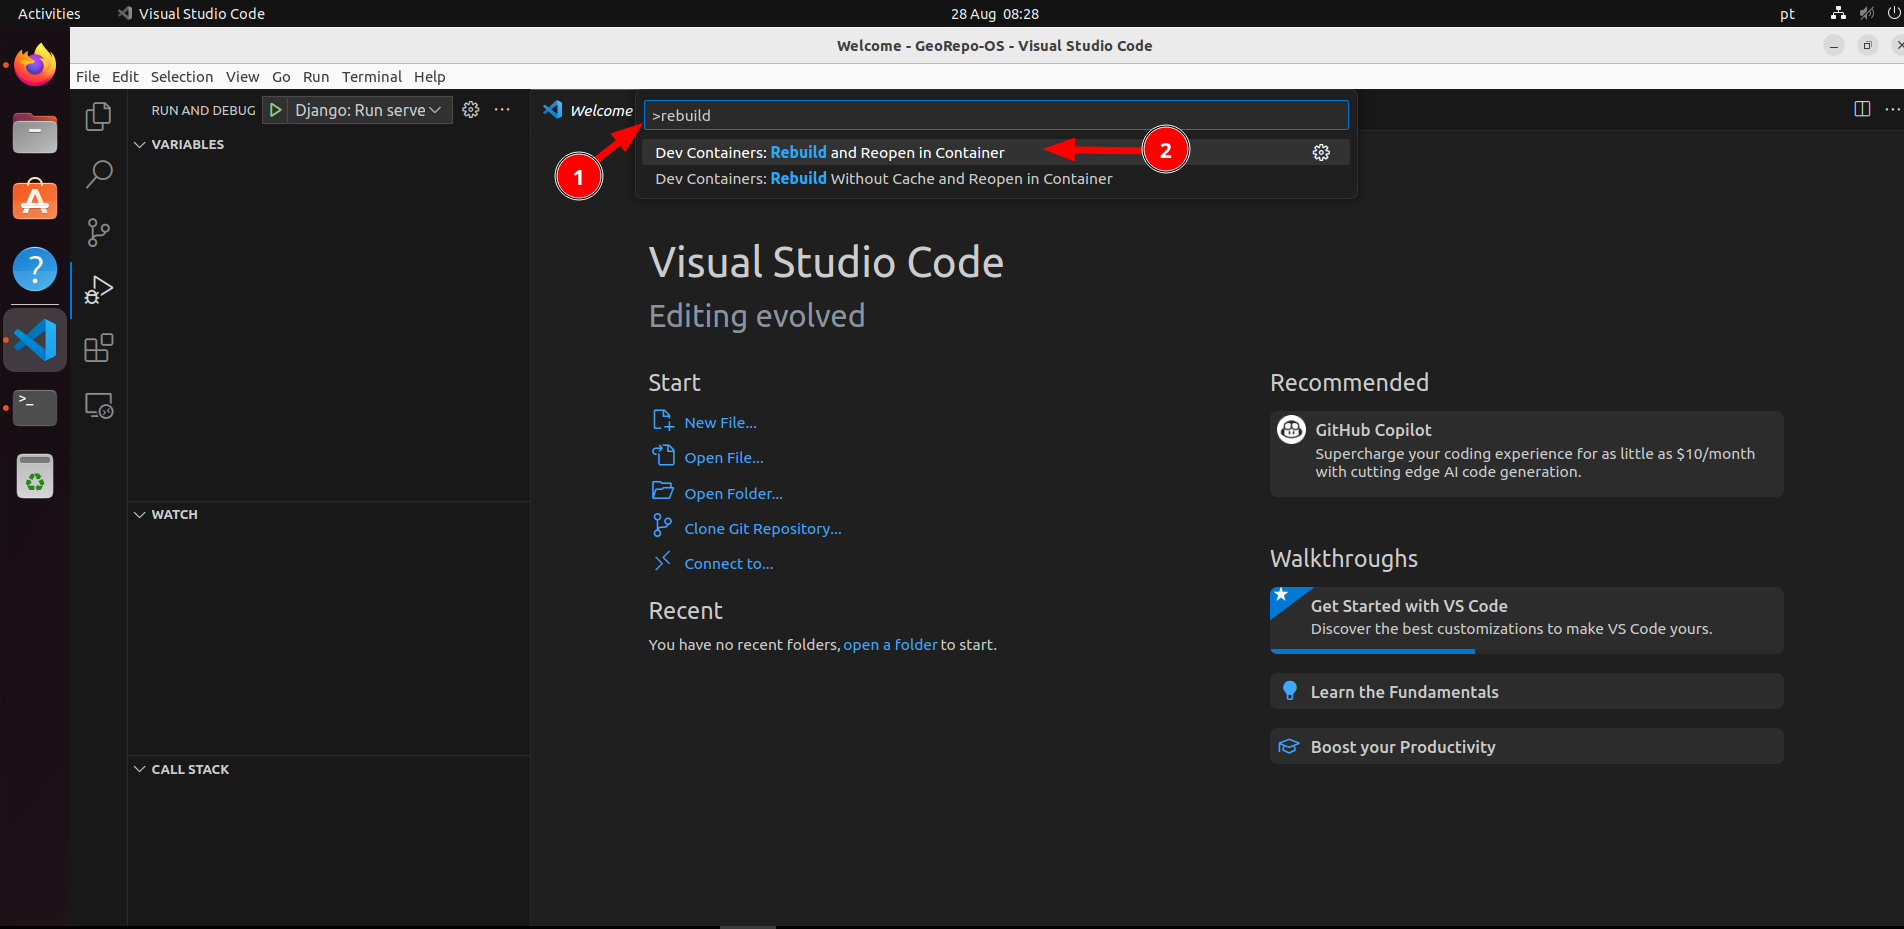
No reopen in container shows
Press Ctrl -> P 1️⃣ and then >and search for Rebuild. Select Dev Containers: Rebuild and Reopen in Container2️⃣. This will essentially mount your code tree inside a docker container and switch the development context of VSCode to be inside the container where all of the python etc. dependencies will be installed.
🪧 Now that the application is set up, you may begin making updates or choose to work with the provided demo data. For instructions, please refer to the Demo Data Guide.